Crash Course - Web Dev with Flask, Heroku, SQLAlchemy, Bootstrap
Table of Contents
This article teaches you how to make a traditional web application based on Python, using Heroku, Flask, SQLAlchemy and Bootstrap.
When I say "traditional web application" I mean the logic and dynamic features are done on the backend rather than the front-end. This means that, for the most part, the page will reload completely every time something changes or the user submits data. If you're not sure what type of web application you want, this article from Microsoft is actually really helpful.
We are writing a simple application that demonstrates storing and retrieving data from a database using a form.
We are going to use all the best tools to do it right. This means we will have a maintainable web app that looks good on both desktop and mobile devices. Therefore this article covers some points regarding project structure, database management and debugging.
Our app will work as follows:
- It will be hosted on Heroku - this is a PaaS cloud platform. This means one can host web applications without needing to manage servers.
- Flask will power our app - this is a backend (server-side) web framework for writing web applications in the Python language, using the Jinja template engine
- Database access will be managed through SQLAlchemy - this is a database toolkit which supports ORM
- We will make our site look nice accross a range of devices using Bootstrap - this is a front-end toolkit for theming your site in a responsive way.
This article will be easiest for you if:
- You have some familiarity with Bash
- You have some familiarity with Git
- You have some familiarity with SQL
- You know some Python
- You know some HTML
- You are running a Debian-based OS and already have git and python3 installed.
The article is designed so that you will follow along with it, running the code samples and commands provided as you go.
Alternatively, there is a special section at the end Rapid Crash Course; no explanation! for people who like to learn fast.
1. Flask on Heroku
We will build a "Hello World" app to begin with. The first step will be to simply run Flask on Heroku.
Make your git repo:
APPNAME=  # only lowercase letters, digits, and dashes. and make
          # it unique as we'll use it for Heroku too
mkdir $APPNAME
cd $APPNAME
git init
Make a file called hello.py with contents:
from flask import Flask
app = Flask(__name__)

@app.route('/')
def index():
    return '<h1>Hello World!</h1>'
And a .gitignore with contents:
__pycache__
venv
.env
Set up the virtualenv:
python3 -m venv venv  # creates a virtualenv called "venv"
source venv/bin/activate
Remember, if you close the terminal you will have to source
venv/bin/activate again.
Use pip to install flask, and test your app locally:
pip install flask export FLASK_APP=hello.py flask run
That command should give you a localhost URL that you can pop in your browser. If that works you've got flask up and running!
OK quit out of that. Now we need to install a proper app server and test it as before.
pip install gunicorn gunicorn hello:app # this refers to function "app" in file "hello.py"
Alright so now our app is working it's time to push it to Heroku.
Make a Heroku account at https://www.heroku.com/
Bookmark the Heroku documentation https://devcenter.heroku.com/
Using the Heroku documentation install the Heroku CLI on your machine.
Once that is done, proceed to link your repo up to Heroku:
heroku login heroku create $APPNAME -r heroku
The "heroku create" command created a site $APPNAME and a remote repository called "heroku" associated with it. See the new remote with:
git remote -v
Now test that locally by making a "Procfile" with the gunicorn command in it:
echo 'web: gunicorn hello:app' > Procfile heroku local
Now we've demonstrated Heroku knows how to launch our app it's time to push our work to the internet!
First we need to save certain information so that Heroku knows how to build the server environment:
pip freeze | tee requirements.txt
Now we must specify the Python runtime. I suggest you will want Heroku to use the same Python version you are running locally. See available runtimes at https://devcenter.heroku.com/articles/python-support#specifying-a-python-version
python -V echo 'python-3.9.2' > runtime.txt
OK now let's go!
git add . git commit git branch -M main git push heroku main:main # localbranch:remotebranch
A reminder on what that git command does. "heroku" is the name of the remote. "main:main" is local branch and remote branch respectively. If you want to use different branch names you may but the remote branch must be "main" or "master".
If that works it will tell you the URL of your site on the public internet. Try it out!
1.1. Things to looks at
Now we've got our "Flask on Heroku" working let's take a brief intermission to look at what you've created.
Take a look look at your Heroku dashboard https://dashboard.heroku.com/apps
Try these Heroku commands to help you get an idea how Heroku dynos work and practice using the built-in help:
heroku ps
heroku help ps
heroku logs
heroku help logs
heroku run bash
heroku help run
One last thing I would like you to do is to understand the
@app.route('/') code we used. Here it is again:
@app.route('/')
def index():
return '<h1>Hello World!</h1>'
This is a Python feature called a decorator, it means that when
index() is called it will actually be passed to app.route.
Let's look at the python help for app.route. Assuming you still have your virtualenv activated, run python3 and then run these commands inside to get the help for that:
from flask import Flask app = Flask(__name__) help(app.route)
That should print the help for app.route so you can find out how this decorator works.
2. Environments, project layout, app configuration
Although we've got our Flask Hello World "working", it does not have proper project structure that will make it easy to maintain long-term. So we now need to sort out the layout, add a staging environment, and learn how to manage app configuration.
2.1. Improve project layout
Our project's current directory structure has the Python code at the top level mixed up with all the other random files. This is a mess.
In order to tidy this up we will make a Python package.
mkdir hello git mv hello.py hello/__init__.py
Now commit that and push it upto Heroku. You will see that it works the same as before.
Over-time as your code grows and you divide bits out you will evolve a healthy tree of modules and packages within your hello directory. See this article from the Flask docs (n.b. instead of "hello" they called their app "flaskr"): Project Layout
2.2. Adding a staging environment
In addition to local testing you will want a staging environment. A test environment in Heroku to validate your app works as expected before pushing changes to production.
This is managed by adding extra git remotes, linked to different sites.
First rename the remote we made before to have a less generic name. I use "prod" for "production".
git remote rename heroku prod
Create the new site. It's a staging env so I call it $APPNAME-stage, with a git remote called "stage".
heroku create $APPNAME-stage -r stage git remote -v
Cool so we now have two remotes, one called "prod" and one called "stage". Remember these as you will use these names to push all future changes like so:
git push stage main:main git push prod main:main
Eventually you may want to add these two apps to a pipeline. I don't want to bloat this article too much so I invite you to add this to your TODO-list of things to read later: Pipelines | Heroku Dev Center.
2.3. Managing app configuration
Alright. Heroku exposes "Config Vars" to your application, which
Python can access easily using os.environ['VARIABLE_NAME']. I call
them "environment variables".
Here is why you need environment variables:
- things like Passwords and API keys should never be committed to your git repo, so they will be in variables
- your staging environment will have different URLs for it's database and other Heroku Add-ons
- your app can know which environment it is so it can do things such as enabling debugging, or displaying a banner to remind you it's a test environment
Take a look at the config vars currently:
heroku ps -a $APPNAME
There's nothing there right now. When we add our database later
Heroku will automatically add a variable DATABASE_URL.
Remember you can use heroku help $COMMAND to find out more about a
command:
heroku help config
Cool now go ahead and add these variables:
heroku config:set FLASK_APP=hello -a $APPNAME heroku config:set APP_ENV=prod -a $APPNAME heroku config:set FLASK_APP=hello -a $APPNAME-stage heroku config:set APP_ENV=stage -a $APPNAME-stage
The FLASK_APP variable allows us to run command-line flask inside
the Heroku dynos like heroku run flask. We'll be doing that later.
The APP_ENV var allows our app to know which environment it is
running in. We are going to use this for our example of how the
variables work.
So let's prove it works by simply getting the value of that
variable and adding it to our page. Edit your hello/__init__.py
to be like this. changes
import os
from flask import Flask
app = Flask(__name__)
@app.route('/')
def index():
return '<h1>Hello World! This environment is "' \
+ os.environ['APP_ENV'] + '"</h1>'
Commit and push that to both environments (prod and stage).
Test that it works. Hooray!
Now you will wonder how we set variables for running our app locally. Well basically we make a ".env" file. Make it like this:
pip install python-dotenv echo "FLASK_APP=hello" >> .env echo "APP_ENV=local" >> .env heroku local
You don't need to commit that as it's in our .gitignore.
Now I invite you to add another task to your TODO-list for later: read the Flask docs on configuration handling.
3. SQLAlchemy
Thus far, our Hello World covers the first two technologies, Heroku and Flask. Now we will add a database and SQLAlchemy.
3.1. Preparing Postgresql
We'll be using Postgresql as it's probably the best relational database and we can get one on a free plan from Heroku.
Firstly we're gonna install Postgres locally:
- bookmark the Heroku doc on local postgres setup
- follow the procedure documented at this link to setup Postgres with peer-authentication
Now you've done that it is time to create the database in Heroku. Firstly observe that the postgres addon is not already installed.
heroku addons
See what versions are available in the Heroku docs here, and choose the version that is closest the the version you have installed locally.
Choose what Plan you will be using here. We will use hobby-dev for this "Hello World" because it is free.
heroku addons:create heroku-postgresql:hobby-dev -a $APPNAME --version=13 heroku addons:create heroku-postgresql:hobby-dev -a $APPNAME-stage --version=13
Great now we've made all our databases! Take a look how everything is:
heroku addons heroku pg:info -a $APPNAME heroku config -a $APPNAME heroku pg:credentials:url -a $APPNAME
3.2. Moving data around
It's important to learn how to move databases around in Heroku.
Now let's connect to the database and add some dummy data:
heroku pg:psql -a $APPNAME
Now add a table with some dummy data in it:
CREATE TABLE farm (id INT, animal VARCHAR(255)); INSERT INTO farm VALUES (1, 'cow'); SELECT * FROM farm;
Alright quit out of that. Now we will pull that database into the staging environment. This requires getting the details first:
heroku config:get DATABASE_URL -a $APPNAME-stage
OK good now you know the deets please use them in this command:
DEETS= heroku pg:pull DATABASE_URL $DEETS -a $APPNAME
Of course you can connect to check that worked by heroku pg:psql
-a $APPNAME-stage and then \d farm
Now we will pull that down to a database on the local Postgres installation.
Decide on a name for your local database and use it in the below
command. DATABASE_URL will automatically refer to your app's live
database because you only have one.
LOCALDBNAME= heroku pg:pull DATABASE_URL $LOCALDBNAME -a $APPNAME
Test with psql $LOCALDBNAME and then \d farm. Cool it worked!
3.3. Connecting the app to the database
How will the app know the credentials to connect to the database when it starts? Well it gets the settings from the environment variables. Take a look and see:
heroku config -a $APPNAME
For running it locally it gets it from your file ".env". That is the file where we can set variables for our local testing. So update .env with the setting for connecting to your database:
echo "DATABASE_URL=postgresql:///$LOCALDBNAME" >> .env
3.4. Tools
OK so let me explain the tools we will be using.
- SQLAlchemy is a library that provides tools for accessing a database
- Flask-SQLAlchemy is a wrapper for SQLAlchemy with some extra features which are useful for web-applications
- Alembic is a database migrations tool. You need this because future versions of your software will likely have different database structures and you need a way to upgrade from the old format to the new
- Flask-Migrate is a wrapper for Alembic which makes it easier to integrate into a Flask app
Install flask-sqlalchemy and flask-migrate (these will pull in SQLAlchemy and Alembic as deps):
pip install wheel # it fails to build alembic without this pip install flask-sqlalchemy flask-migrate
We also need psycopg2 which requries extra deps to build:
sudo apt install python3-dev libpq-dev build-essential pip install psycopg2
Add to requirements:
pip freeze | tee requirements.txt
Notice your flask shell command now has an extra command for db
migrations:
flask --help
3.5. Flask-migrate
We setup Flask-Migrate before we even make our app use the database. This means it's managing our data schema right from the outset.
But before we do anything please delete all the test data you made earlier as we want Flask-migrate to build up from an empty database:
heroku pg:reset DATABASE_URL -a $APPNAME heroku pg:reset DATABASE_URL -a $APPNAME-stage dropdb $LOCALDBNAME # try dropdb --help for more info createdb $LOCALDBNAME
OK cool. Now modify your app like this. changes
import os
import re
from flask import Flask
from flask_sqlalchemy import SQLAlchemy
from flask_migrate import Migrate
app = Flask(__name__)
app.config['SQLALCHEMY_DATABASE_URI'] = re.sub('postgres://', 'postgresql://', os.environ['DATABASE_URL'])
db = SQLAlchemy(app)
migrate = Migrate(app, db)
class Farm(db.Model):
id = db.Column(db.Integer, primary_key=True)
animal = db.Column(db.String(128))
diet = db.Column(db.String(128))
@app.route('/')
def index():
return '<h1>Hello World! This environment is "' \
+ os.environ['APP_ENV'] + '"</h1>'
The most interesting part we've just added is the db model. This defines the schema of our dummy database we made earlier, except we've added an extra column.
Now we will initialise flask_migrate:
flask db init
OK now we get to see the power of Alembic. The following command will compare the database structure we defined in our Python code with what exists in Postgres and produce a migration plan:
flask db migrate -m "Initial migration."
Alright now review the migration-plan it just made. For me I have
an migrations/versions/f8747a559443_initial_migration.py
containing an upgrade function like this:
def upgrade():
# ### commands auto generated by Alembic - please adjust! ###
op.create_table('farm',
sa.Column('id', sa.Integer(), nullable=False),
sa.Column('animal', sa.String(length=128), nullable=True),
sa.Column('diet', sa.String(length=128), nullable=True),
sa.PrimaryKeyConstraint('id')
)
# ### end Alembic commands ###
As you can see it is creating database structures to support the db model we defined in our python code.
n.b. you must always review the migration plan as it won't always get it right!
Now we get to upgrade our db! Remember as we are running it locally
it gets the database details from our .env file.
flask db upgrade
Awesome! Now you may use psql to connect to your db and check that it added our table:
psql $LOCALDBNAME \d farm
See that we now also have a table alembic_version
SELECT * FROM alembic_version;
When you create future migrations it uses this to find which
migration script to run next. See the Revises field in the
migraton plan.
Alright so how do we run the migration on Heroku? Well firstly add
the migrations directory to version control and push to our
staging environment:
git add migrations git commit -a git push stage main:main
OK great now using heroku run we can easily run the migration in
our staging environment.
heroku run flask db upgrade -a $APPNAME-stage
Now check that it created the table!
heroku pg:psql -a $APPNAME-stage \d farm
Great! Now we know it works; repeat that on your prod environment too (from git push).
I recommend you bookmark the docs for Flask-Migrate for future reference.
3.6. Flask-SQLAlchemy
OK now to update our app to actually use our database.
Remember in your hello/__init__.py you defined your database model
like this:
class Farm(db.Model):
id = db.Column(db.Integer, primary_key=True)
animal = db.Column(db.String(128))
diet = db.Column(db.String(128))
Just to recap; we are using SQLAlchemy ORM functionality through a wrapper called Flask-SQLAlchemy. It's wize to bookmark the docs for Flask-SQLAlchemy.
So the next part is to use Python code to write and read the table. Notes on how we do it:
- we will be processing form input using flask "request" object.
- we ought to be using Jinja templates for HTML but we'll introduce that later
OK so modify your hello/__init__.py to be like this: changes
import os
import re
from flask import Flask
from flask_sqlalchemy import SQLAlchemy
from flask_migrate import Migrate
from flask import request
app = Flask(__name__)
app.config['SQLALCHEMY_DATABASE_URI'] = re.sub('postgres://', 'postgresql://', os.environ['DATABASE_URL'])
db = SQLAlchemy(app)
migrate = Migrate(app, db)
class Farm(db.Model):
id = db.Column(db.Integer, primary_key=True)
animal = db.Column(db.String(128))
diet = db.Column(db.String(128))
@app.route('/', methods=['GET', 'POST'])
def index():
response = '<h1>Hello World! This environment is "' \
+ os.environ['APP_ENV'] + '"</h1>'
if request.method == 'POST':
new_animal = Farm(animal=request.form['animal'], diet=request.form['diet'])
db.session.add(new_animal)
db.session.commit()
response += '<p>The farm has these animals:</p><ul>'
for entry in Farm.query:
response += '<li>' + entry.animal + ' eats ' + entry.diet + '</li>'
response += '</ul>'
response += '''<form action="/" method="post"><br>
Animal: <input type="text" name="animal">
eats: <input type="text" name="diet">
<input type="submit" value="Submit">
</form>'''
return response
Alright now give that a whirl using heroku local. You can add
your animal and it's diet and click "Submit". Then the animal is
added to the database, and displayed back on the page. Add a few
animals just so you have some data.
Commit it to git and promote it to your staging environment to test it works there too.
Now I recommend you add the flask documentation on db models to your TODO-list to ready later: Declaring Models – Flask-SQLAlchemy Documentation
4. Debugging your Flask app
Now you might find this boring but I wouldn't sleep well at night if I didn't at-least briefly cover some bits regarding debugging and logging.
4.1. Tracebacks
Firstly I want you to break your app by misusing the "Farm"
object. Add this to your index() function:
test = Farm['animal']
Now test that using heroku local. The web-page itself does not
display any debugging info just a generic error (this is good for
security). But you will notice that heroku local displays a
Traceback on your terminal.
Now commit and push your broken code to your stage environment.
Try loading the page to produce the error and then see it using
heroku logs -a $APPNAME-stage
4.2. Verbose output from heroku local
If you want heroku local to output some basic info for every
request you can set it to run in verbose mode.
Edit your "Procfile" thus:
echo 'web: gunicorn hello:app --log-level DEBUG' > Procfile
4.3. Accessing Python help
Alright cool. So we can see from our traceback that the pertinent error is "TypeError: 'DefaultMeta' object is not subscriptable". But how to fix it? You could look in the official docs for Flask-SQLAlchemy, but Python actually has a built-in help system which can give you specific information much more quickly. Here's how.
Firstly, in your project directory with your virtualenv still active, run python3 interactively. Now run these commands:
from dotenv import load_dotenv load_dotenv()
Now your python has read your .env and has the same variables as
your application does when run locally. Now you can import your
Farm object and find out more about it:
from hello import Farm help(Farm) help(Farm.query)
\o/ OK good quit out of that. And please remove the broken line you added.
Now to make this easier in future let's add the dotenv import to
our app so you wont have to do that step manually. Here's how
__init__.py will look now: changes
import os
import re
from flask import Flask
from flask_sqlalchemy import SQLAlchemy
from flask_migrate import Migrate
from flask import request
from dotenv import load_dotenv
load_dotenv()
app = Flask(__name__)
app.config['SQLALCHEMY_DATABASE_URI'] = re.sub('postgres://', 'postgresql://', os.environ['DATABASE_URL'])
db = SQLAlchemy(app)
migrate = Migrate(app, db)
class Farm(db.Model):
id = db.Column(db.Integer, primary_key=True)
animal = db.Column(db.String(128))
diet = db.Column(db.String(128))
@app.route('/', methods=['GET', 'POST'])
def index():
response = '<h1>Hello World! This environment is "' \
+ os.environ['APP_ENV'] + '"</h1>'
if request.method == 'POST':
new_animal = Farm(animal=request.form['animal'], diet=request.form['diet'])
db.session.add(new_animal)
db.session.commit()
response += '<p>The farm has these animals:</p><ul>'
for entry in Farm.query:
response += '<li>' + entry.animal + ' eats ' + entry.diet + '</li>'
response += '</ul>'
response += '''<form action="/" method="post"><br>
Animal: <input type="text" name="animal">
eats: <input type="text" name="diet">
<input type="submit" value="Submit">
</form>'''
return response
Commit that.
4.4. Logging extra messages
Now I just want to teach you how to send extra messages to the logs.
Basically as documented here you can log extra messages just by
using app.logger.
Add this to your index() function:
app.logger.error('Would you love a monsterman?')
Now when you look in your logs in heruko local (or heroku logs
once you deploy it) you can see the message.
Now like before I want you to take a look at the help for
app.logger. Start a python interactive shell and:
from hello import app help(app.logger)
Alright cool that worked now you can remove the logging line from your app.
5. Flask templates
OK great so now that we have the great wisdom of debugging and logging for our Flask app, what to do next? Well basically we need to adapt our app to use templates rather than concatenating strings together in Python. It quickly becomes an unmanageable mess otherwise.
We will be using Jinja2 which is the normal choice for Flask apps. I won't go into great detail on Jinja2 as it's best you just read the Jinja2 docs. But I will show you how to quickly get up and running with it.
mkdir hello/templates
We're gonna make a template "base.html" which will contain all our styling and boilerplate text, and an "index.html" for content that's specific to this page.
Make "base.html" in your templates directory with this contents:
<!doctype html>
<html lang="en">
<head>
<meta charset="utf-8">
<title>My Farm</title>
<meta name="description" content="What the animals on the farm eat.">
</head>
<body>
<header>
</header>
<main>
{% block content %}
{% endblock %}
</main>
<footer>
</footer>
</body>
</html>
And make "index.html" with this contents:
{% extends "base.html" %}
{%- block content %}
<h1>Hello World! This environment is "{{ environment }}"</h1>
<p>The farm has these animals:</p>
<ul>
{%- for entry in animals %}
<li>{{ entry.animal }} eats {{ entry.diet }}</li>
{%- endfor %}
</ul>
<form action="/" method="post"><br>
Animal: <input type="text" name="animal">
eats: <input type="text" name="diet">
<input type="submit" value="Submit">
</form>
{%- endblock %}
Now edit your __init__.py as follows: changes
import os
import re
from flask import Flask
from flask_sqlalchemy import SQLAlchemy
from flask_migrate import Migrate
from flask import request
from flask import render_template
from dotenv import load_dotenv
load_dotenv()
app = Flask(__name__)
app.config['SQLALCHEMY_DATABASE_URI'] = re.sub('postgres://', 'postgresql://', os.environ['DATABASE_URL'])
db = SQLAlchemy(app)
migrate = Migrate(app, db)
class Farm(db.Model):
id = db.Column(db.Integer, primary_key=True)
animal = db.Column(db.String(128))
diet = db.Column(db.String(128))
@app.route('/', methods=['GET', 'POST'])
def index():
if request.method == 'POST':
new_animal = Farm(animal=request.form['animal'], diet=request.form['diet'])
db.session.add(new_animal)
db.session.commit()
response = render_template('index.html',
environment=os.environ['APP_ENV'],
animals=Farm.query
)
return response
Now when you test this with heroku local you will see that it
produces the same page. The advantages are:
- our code is not a complete mess
- the template system allows us to have a separate file for the formatting + boilerplate which we can apply consistently across our site
- has features such as automatic HTML escaping that make your life easier
Now add, commit and push:
git add hello/templates git commit -a git push stage main:main
Now I invite you to add another item to your TODO-list for later. Read the Jinja2 docs.
6. Making it look nice with Bootstrap
OK so you might have noticed that HTML sites are hideously ugly without theming applied.
The simplest way I can explain bootstrap is it's a bunch of CSS classes which provides basic building-blocks to make a site that's formatted nicely on both mobile and desktop.
First we need to add the bootstrap CSS and JS to the page. The official docs tell you how to do this.
Then to center the page and sort out the width add the container
class to your <main>.
Here is what our template
base.html will book like after you make those changes: changes
<!doctype html>
<html lang="en">
<head>
<meta charset="utf-8">
<title>My Farm</title>
<meta name="description" content="What the animals on the farm eat.">
<!-- Bootstrap CSS -->
<link href="https://cdn.jsdelivr.net/npm/bootstrap@5.0.0-beta3/dist/css/bootstrap.min.css" rel="stylesheet" integrity="sha384-eOJMYsd53ii+scO/bJGFsiCZc+5NDVN2yr8+0RDqr0Ql0h+rP48ckxlpbzKgwra6" crossorigin="anonymous">
</head>
<body>
<header>
</header>
<main class="container">
{% block content %}
{% endblock %}
</main>
<footer>
</footer>
<!-- Bootstrap JS bundle -->
<script src="https://cdn.jsdelivr.net/npm/bootstrap@5.0.0-beta3/dist/js/bootstrap.bundle.min.js" integrity="sha384-JEW9xMcG8R+pH31jmWH6WWP0WintQrMb4s7ZOdauHnUtxwoG2vI5DkLtS3qm9Ekf" crossorigin="anonymous"></script>
</body>
</html>
Now when you test this with heroku local you will see that the
fonts are less hideous and there are margins. These margins will
automatically adapt to the screen size.
Now we'll setup our form nicely using the example in the Bootstrap
Forms docs. Before we do that just try making your
browser window very narrow and see how it looks: 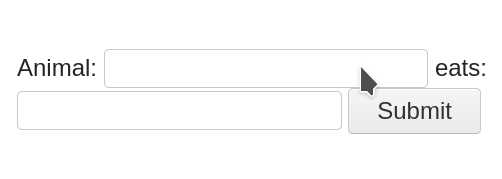
OK that's uggly so edit your index.html thus: changes
{% extends "base.html" %}
{%- block content %}
<h1>Hello World! This environment is "{{ environment }}"</h1>
<p>The farm has these animals:</p>
<ul>
{%- for entry in animals %}
<li>{{ entry.animal }} eats {{ entry.diet }}</li>
{%- endfor %}
</ul>
<form action="/" method="post">
<div class="mb-3">
<label for="animal1" class="form-label">Animal</label>
<input type="text" name="animal" class="form-control" id="animal1">
</div>
<div class="mb-3">
<label for="diet1" class="form-label">eats</label>
<input type="text" name="diet" class="form-control" id="diet1">
</div>
<button type="submit" class="btn btn-primary">Submit</button>
</form>
{%- endblock %}
View with heroku local and see how much nicer it looks!
OK now let's use Bootstrap's list groups to make the list of animals
and their diet look cool. Edit index.html again: changes
{% extends "base.html" %}
{%- block content %}
<h1>Hello World! This environment is "{{ environment }}"</h1>
<p>The farm has these animals:</p>
<ul class="list-group list-group-flush mb-4">
{%- for entry in animals %}
<li class="list-group-item">{{ entry.animal }} eats {{ entry.diet }}</li>
{%- endfor %}
</ul>
<form action="/" method="post">
<div class="mb-3">
<label for="animal1" class="form-label">Animal</label>
<input type="text" name="animal" class="form-control" id="animal1">
</div>
<div class="mb-3">
<label for="diet1" class="form-label">eats</label>
<input type="text" name="diet" class="form-control" id="diet1">
</div>
<button type="submit" class="btn btn-primary">Submit</button>
</form>
{%- endblock %}
Looks great!
I can't do Bootstrap justice as it would require an entire article (or book) by itself, but of-course there is online documentation. I suggest taking a look at the examples and templates to see what sort of thing you can do with bootstrap.
7. Rapid Crash Course; no explanation!
In this section we will make the same project as quickly as possible, with no explanation. This is useful for people who like to learn fast.
We make these assumptions:
- postgresql is already installed and setup so you can run psql as normal user
- you already have a Heroku account and the Heroku CLI installed.
7.1. Run these commands
APPNAME= # only lowercase letters, digits, and dashes. and make
# it unique as we'll use it for Heroku too
LOCALDBNAME= # can be same as APPNAME if you like
mkdir $APPNAME
cd $APPNAME
git init
mkdir -p hello/templates
cat <<EOF >.gitignore
__pycache__
venv
.env
EOF
python3 -m venv venv
source
  venv/bin/activate
sudo apt install python3-dev libpq-dev build-essential # for building psycopg2
pip install flask gunicorn python-dotenv wheel flask-sqlalchemy flask-migrate psycopg2
pip freeze > requirements.txt
heroku login
heroku create $APPNAME -r prod
heroku create $APPNAME-stage -r stage
heroku config:set FLASK_APP=hello -a $APPNAME
heroku config:set APP_ENV=prod -a $APPNAME
heroku config:set FLASK_APP=hello -a $APPNAME-stage
heroku config:set APP_ENV=stage -a $APPNAME-stage
heroku addons:create heroku-postgresql:hobby-dev -a $APPNAME --version=13
heroku addons:create heroku-postgresql:hobby-dev -a $APPNAME-stage --version=13
createdb $LOCALDBNAME
echo 'web: gunicorn hello:app' > Procfile
cat <<EOF >.env
FLASK_APP=hello
APP_ENV=local
DATABASE_URL=postgresql:///$LOCALDBNAME
EOF
echo 'python-3.9.2' > runtime.txt
7.2. Add these files
hello/__init__.py
import os
import re
from flask import Flask
from flask_sqlalchemy import SQLAlchemy
from flask_migrate import Migrate
from flask import request
from flask import render_template
from dotenv import load_dotenv
load_dotenv()
app = Flask(__name__)
app.config['SQLALCHEMY_DATABASE_URI'] = re.sub('postgres://', 'postgresql://', os.environ['DATABASE_URL'])
db = SQLAlchemy(app)
migrate = Migrate(app, db)
class Farm(db.Model):
    id = db.Column(db.Integer, primary_key=True)
    animal = db.Column(db.String(128))
    diet = db.Column(db.String(128))
@app.route('/', methods=['GET', 'POST'])
def index():
if request.method == 'POST':
new_animal = Farm(animal=request.form['animal'], diet=request.form['diet'])
db.session.add(new_animal)
db.session.commit()
response = render_template('index.html',
environment=os.environ['APP_ENV'],
animals=Farm.query
)
return response
hello/templates/base.html
<!doctype html>

<html lang="en">
  <head>
    <meta charset="utf-8">

    <title>My Farm</title>
    <meta name="description" content="What the animals on the farm eat.">

    <!-- Bootstrap CSS -->
    <link href="https://cdn.jsdelivr.net/npm/bootstrap@5.0.0-beta3/dist/css/bootstrap.min.css" rel="stylesheet" integrity="sha384-eOJMYsd53ii+scO/bJGFsiCZc+5NDVN2yr8+0RDqr0Ql0h+rP48ckxlpbzKgwra6" crossorigin="anonymous">
  </head>
  <body>
    <header>
    </header>
    <main class="container">
        {% block content %}
        {% endblock %}
    </main>
    <footer>
    </footer>

    <!-- Bootstrap JS bundle -->
    <script src="https://cdn.jsdelivr.net/npm/bootstrap@5.0.0-beta3/dist/js/bootstrap.bundle.min.js" integrity="sha384-JEW9xMcG8R+pH31jmWH6WWP0WintQrMb4s7ZOdauHnUtxwoG2vI5DkLtS3qm9Ekf" crossorigin="anonymous"></script>
  </body>
</html>
hello/templates/index.html
{% extends "base.html" %}
{%- block content %}
      <h1>Hello World! This environment is "{{ environment }}"</h1>
      <p>The farm has these animals:</p>
      <ul class="list-group list-group-flush mb-4">
        {%- for entry in animals %}
          <li class="list-group-item">{{ entry.animal }} eats {{ entry.diet }}</li>
        {%- endfor %}
      </ul>
      <form action="/" method="post">
        <div class="mb-3">
          <label for="animal1" class="form-label">Animal</label>
          <input type="text" name="animal" class="form-control" id="animal1">
        </div>
        <div class="mb-3">
          <label for="diet1" class="form-label">eats</label>
          <input type="text" name="diet" class="form-control" id="diet1">
        </div>
        <button type="submit" class="btn btn-primary">Submit</button>
      </form>
{%- endblock %}
7.3. Upgrade db and test locally
Run these commands
flask db init
flask db migrate -m "Initial migration."
flask db upgrade
heroku local  # it works \o/
7.4. Heroku time
git add .
git commit
git branch -M main
git push stage main:main
heroku run flask db upgrade -a $APPNAME-stage
git push prod main:main
heroku run flask db upgrade -a $APPNAME
Now visit both sites and check they work.
8. Recap
I want to include a few helpful bits just to finish off.
8.1. Code
The project we made in this tutorial is in Gitlab here.
8.2. Workflow for updating app
Just a reminder of what your workflow should be when you develop your app.
8.2.1. Activate
cd blah
source venv/bin/activate
8.2.2. Edit
Now edit your code using your favourite text editor.
8.2.3. Local test
heroku local
8.2.4. Commit
If it works great, commit your changes to git.
8.2.5. Push to staging
git push stage localbranch:main
8.3. Allowing more people to contribute
So you want to add your friend so they can contribute too?
First setup a repository on GitHub or Gitlab as remote origin for your code and push it. Then send your friend a Heroku invite using the docs.
Now your friend needs to:
8.3.1. Get the code
Clone the code from GitHub or GitLab.
8.3.2. Setup the virtualenv
They need to setup their virtualenv:
python3 -m venv venv
source venv/bin/activate
sudo apt install python3-dev libpq-dev build-essential
pip install -r requirements.txt
8.3.3. Heroku
Now they need to install the Heroku CLI using the Heroku documentation.
8.3.4. Setup database and .env
Next they should install postgres locally and pull down the database to their local system as documented here.
Once that's done they can create the .env:
cat <<EOF >.env
FLASK_APP=hello
APP_ENV=local
DATABASE_URL=postgresql:///$LOCALDBNAME
EOF
8.3.5. Lets go!
At this point they should be able to test the app using heroku
local.
8.4. Further reading
Throughout this article there were several places where I suggested things to bookmark, or extra reading "for later". Here's a recap:
- I advised you to bookmark the Heroku documentation
- I advised you to read the Flask docs on project layout
- I suggested you might want to eventually consider Heroku Pipelines
- I suggested you read the Flask docs on configuration handling
- I recommended you bookmark the docs for Flask-Migrate
- I recommended you bookmark the docs for Flask-SQLAlchemy
- I advised you to read the Flask-SQLAlchemy docs on declaring models
- I advised you to read the Jinja2 docs
- I linked you to the Bootstrap Docs
- I suggested you look at the Bootstrap examples and templates
I hope this article has given you enough knowledge to get started with Python web development. If you really want to learn more then the O'REILLY book on "Flask Web Development" is probably a good start.